|
||||||||||||||||||||||
Control Panel
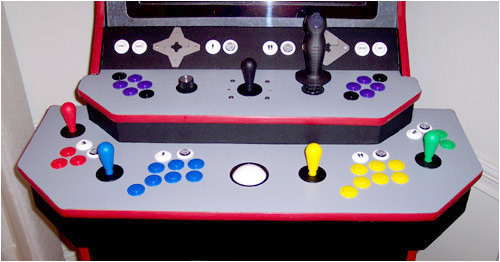
This "split-level" design allows for a larger than normal collection of controls. By raising the center section above the joysticks of the lower section, there is no danger of the outer controls getting in the way of the inner controls. The design diagram below explains the placement of the controls:
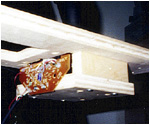
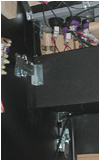
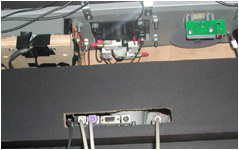
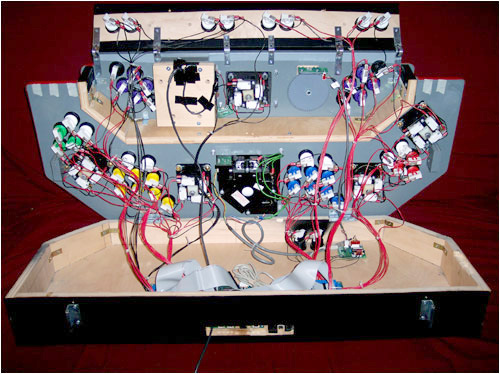
The entire control panel is held in place by panel clamps, and can be completely removed. The controls are interfaced into the computer using Hagstrom Electronics keyboard encoder (KE-72) and mouse encoder (ME-4). The flight stick interfaces directly to the PC using the USB port. The wiring is the usual rat's nest:
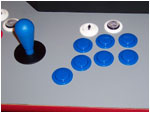
Joysticks and Pushbuttons:
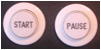
All of the joysticks and pushbuttons are the "competition" style from Happ controls. I used Avery label paper to put labels on some of the buttons, including the "Start" button and the "Coin" buttons. The joysticks are screwed in from below the control panel using "insert nuts." These are long nuts with spines that you drive into the wood with a hammer, then you can screw directly into them. This style of installation allows me to mount the joysticks without any screws showing on top of the control panel. Update: You can accomplish the same thing by just selecting wood screws that are the right length, and screwing directly into the wood. Many people get very solid results doing this. The insert nuts are a great solution, but they are probably overkill. Trackball:
Update: Several individuals have noted that the trackball position I used is horrible if you like to play Golden Tee. They are correct. Any game that requires you to slam the trackball super hard would be impossible in this position. That being said, older classics like Crystal Castles, Marble Madness, Centipede. and Missile Command all play perfectly, so I stand behind my design. But if Golden Tee is your game (I can't stand golf, video or otherwise), then you should look for another design. Restrictor Plates:
Update: Oscar Controls Restrictor Plates are no longer available, and I wouldn't use them in any future projects, anyway. At the time, they were the best solution to a very difficult problem. However, there are now many other solutions available. I recommend using the Ultimarc T-stick Plus. Just put it in 8-way mode, and it makes a perfect Q*Bert joystick. It is also one of the best 4-way joysticks out there. Spinner:
The spinner was also provided by Oscar Controls. Specifically, it is the Oscar Pro with a black skirted knob (Tempest style). My earlier machines used the Arkanoid spinner from Happ controls, and I was never very happy with it. The Arkanoid spinner has three gears that mesh and give it a very heavy feel, and you can actually hear the gears grinding when you spin it. The Oscar Pro just has one large wheel, and it has a really great feel to it. I can give it a good hard spin, and it'll keep going for a long time. I don't get any "backspin" either. I would recommend this spinner to anyone building a cabinet. Flight Stick:
|
||||||||||||||||||||||
All content on this website is Copyright 2003-2007 by Jeffrey Forester Allen and may not be reused or reproduced without permission. |
||||||||||||||||||||||
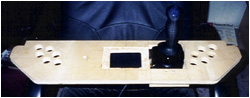
 The main thing you need to know about the construction of this control panel is that each panel is covered in a thin layer of Formica (countertop laminate). This makes the surface smooth, where there would otherwise be breaks (at the edge of the trackball plate, or around the base of the flight stick). After the Formica, the top of the panel was finished with gray vinyl.

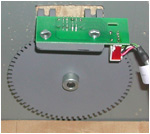
 The trackball is the 3" trackball from Happ, using a mounting kit. This is the newer style of mounting kit, which is flat on top (no screws show on top). The Formica hides the trackball plate completely.
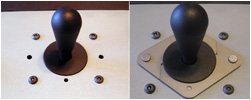 If you haven't seen these nifty little dodads before, then you should definitely check them out at Oscar Controls. Basically, they are removable plates that allow you to transform an 8-way joystick into a true 2-way, 4-way, or diagonal joystick. I originally tried mounting the joystick directly into the wood like the other joysticks, but I found that in order for the diagonal restrictors to work properly, I needed the joystick to be within 1/4" of the top of the control panel. I redid it using the mounting plate provided by Oscar Controls (that's why this one joystick has screws showing). The actual mounting plate is hidden by the layer of Formica. The restrictor plates provide a nice alternative if you can't put a 4-way diagonal joystick on your control panel.
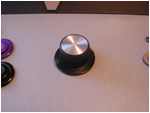
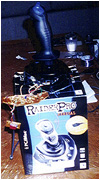
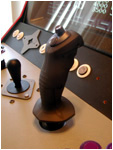 The flight stick proved to be one of the most interesting pieces to mount. I originally planned on using a Microsoft Sidewinder, but after my first attempt, I realized that I wanted an ambidextrous flight stick, so I replaced it with the Raider Pro. I used a hacksaw to trim as much of the base as possible. Next, I mounted the joystick on a piece of plywood, which in turn attached to the control panel. There is a large hole where the flight stick comes all the way up to the top of the control panel, but it is hidden by the layer of Formica.